


GIT is slowly becoming a mandatory tool in the programming / developing world. I recently realized that I still do manual version control :( So I decided to finally teach myself what GIT is and how to go about using it to manage a repository! I really hope I can move away from manual version control after this :) Let's get into it!
What is GIT?
Git is basically an open source version control system / source control system which was specifically designed to handle projects of multiple scale. Git is also slowly becoming a prerequisite to working with code in the real world! GIT is known to be easy to learn and is also very light weight! (Most Linux distros actually have git pre installed). Moreover, GIT was mainly developed to make life way easier for group of developers who are collaborating on a project!
Misconceptions about GIT~
Most students and beginners believe that GIT and GitHub are the same! In some cases, they also think that GitHub came before GIT. Commands like git clone are often thought to be extra functionalities from GitHub themselves.I'm not shy to admit that I was once one of those people :(
Why do I need to lean GIT?
GIT makes it way easier for anyone working with code or any sort of configuration to merge it with the origin source. It removes the hassle that you have to go through to get the updated code merged with the "MAIN" file. Furthermore, you can finally stop worrying about doing silly manual version control for that school project that you are working on~!
Basic GIT resources can be found here!
GIT Config
Before we begin, we need to ensure that we have a GIT config file with our name and email address. This is very crucial as this is the data that will be conveyed to the repository's owner when they receive a pull request or a commit from us. This is the data that will be used to track back to which developer made which changes to the code. So lets first make sure we have that setup.
Lets do the following to make sure that we have the correct name and email setup.
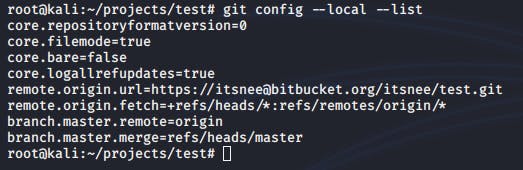
[Extra]To view the information regarding the remote source that you are working with, you can simple head into the directory on your machine and enter the following command.
Lets say you want do not want an online repository and you would like to initialize GIT in a local repository, you can do so with the following command.
Creating a Repository
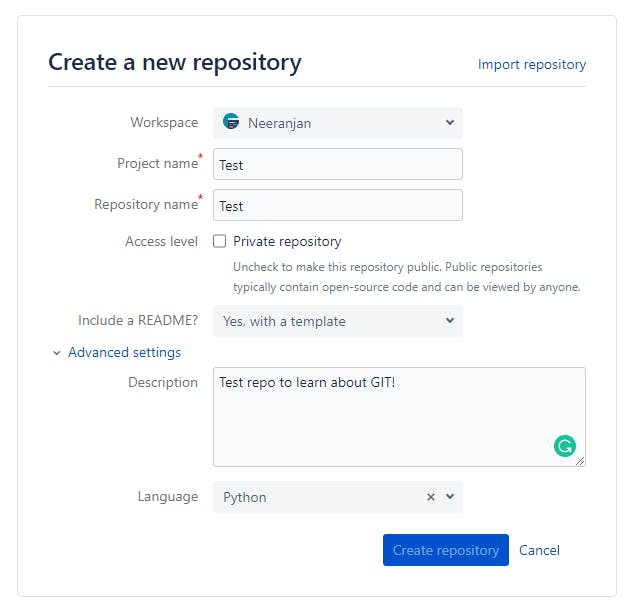
Okay, enough of me blabbering, lets get into it. To start of, lets first create a repository that we can work with. I will be working with BitBucket for this process.
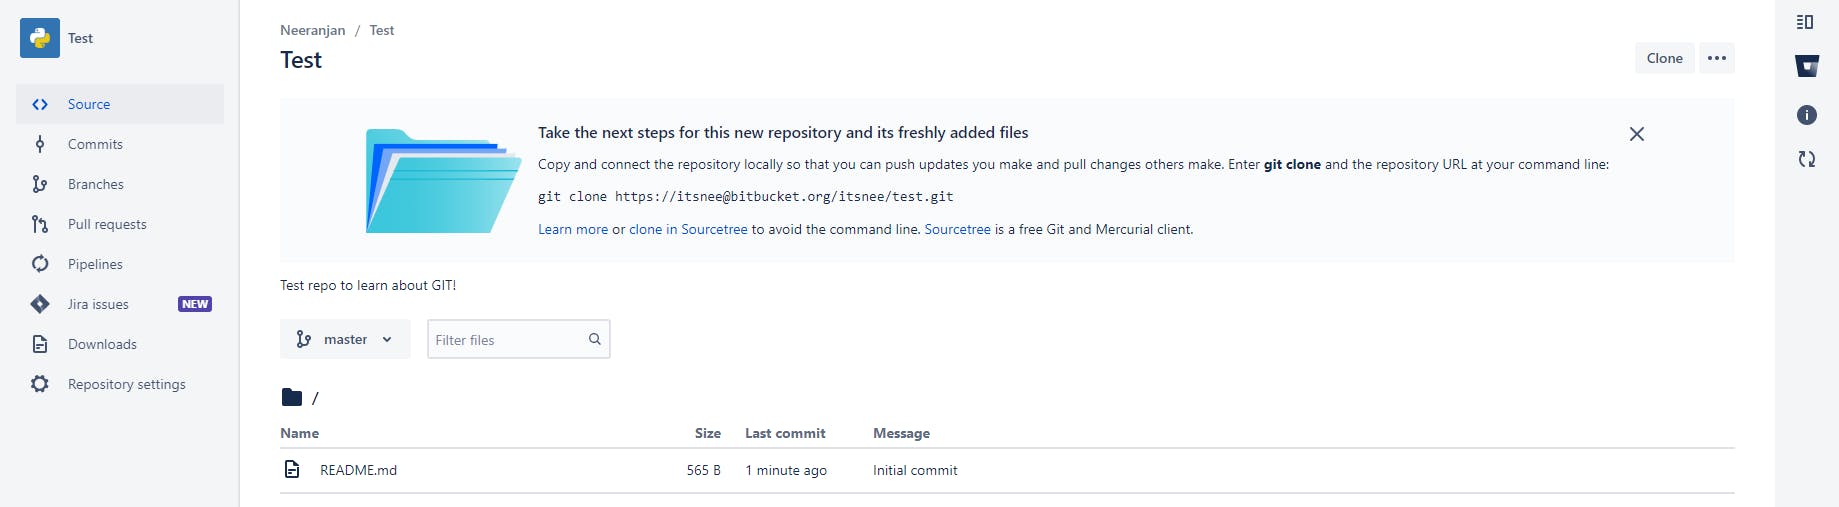
Here we have the repository successfully created! Now lets learn about how we can get files onto it using the GIT tool.
Cloning a repository to your local machine
First, lets clone this repository onto our local machine so that we can then make changes to it and then send it back to the source we cloned it from! The following is the command to do so.
Staging area
After we have made our changes to the cloned repository AKA added/modified code, the staging area shows us what exactly has been changed in repository.
To emulate that, lets go ahead and create a simple python file in the cloned project.
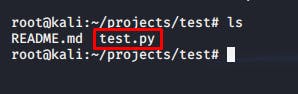
Now that we have made some changes to the clones repository, lets go ahead and check if GIT knows what we have done. We can do that with the following command.
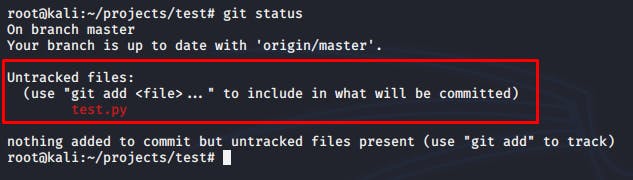
Here we notice that GIT has some untracked files. This means that these files are not being tracked by our source repository and are not ready to be committed. To change that, we can simple add the file by using the following command.
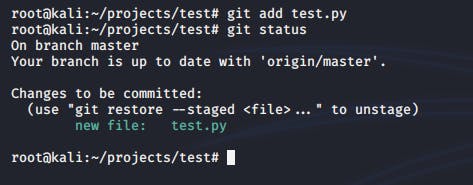
Now when we do git status we will be able to see that we have one file that is ready to be committed to the repository.
Committing a change to the repository
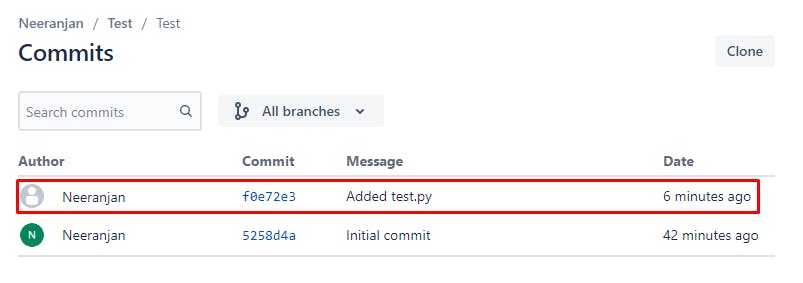
Now that we have prepped our file, its time to commit it to the local repository . We can add a comment while committing this change by using the -m tag.

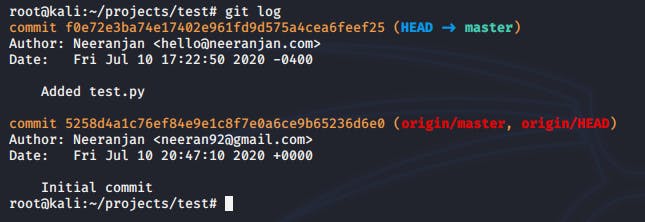
We have now successfully committed this change locally. Next lets take a look at how we can push this change to our remote origin. However, if you would like view your previous commits, you can simply do that using the following command.
Pushing a change to the remote repository
Now that we are all set, we can use the following command to push all the changes that we have made to the remote repository that we cloned. Keep in mind, its going to ask you for your password to be able to push the change.
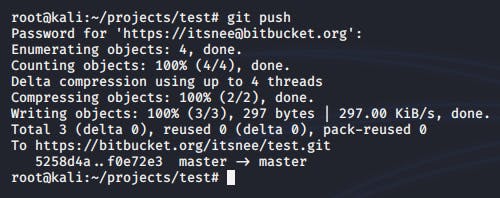
Now, if we head back to the BitBucked tab on our browser, we would be able to see the change that we just committed to the remote repository.
Creating branches in a repository
Lets say we are developing some code for our program. We definitely wouldn't test the new code in the same area where all the other code reside. This is where branches come in very useful. We are able to create a whole new directory which is basically a clone of the master branch. This allows you to make changes, commit, test and push those changes to a separate branch! I will stimulate a development branch for this use case. The following command would help us create a development branch .
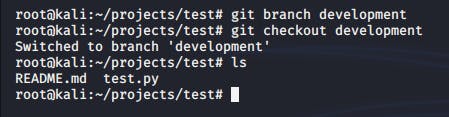
We notice that we have switched to the newly created branch yet, we still have all the files from the master branch. Like I mentioned earlier, this is to help developers who are testing new code which they are planning to implement into the final version! This could be very useful in many use cases.
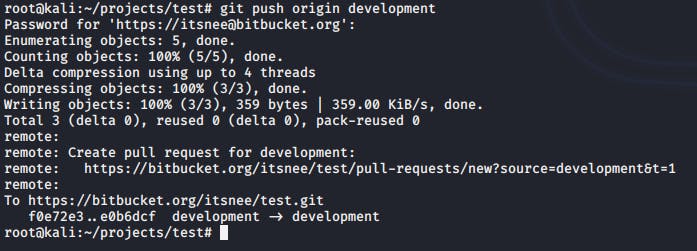
Now that we have created a branch, lets push that branch to the remote repository! We can do that with the following command
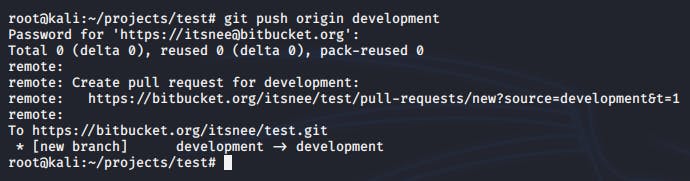
Now that we have successfully pushed this branch to the remote repository, lets verify that by going into BitBucket.
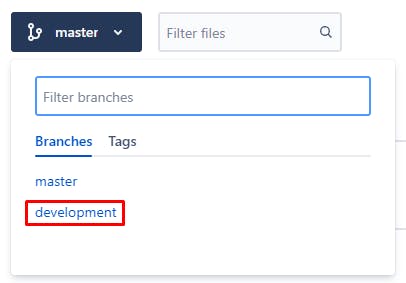
Great, we have successfully added a new branch in our remote repository.
Merging branches
Now that we have made changes to the development branch and we have decided that the code there is stable, we want to merge it back to the "stable" code. Here's how we can do that.
The git add and git commit commands are exactly same as mentioned above. They can be used to make changes and edits to the newly created branch. However, the git push command is as follows.
Lets head back to BitBucket and verify this change.

Now that we have verified this change, let's go ahead and merge the 2 branches with the following command.
We have to first switch back to the master branch. We can do that with
Next we just need to enter the following
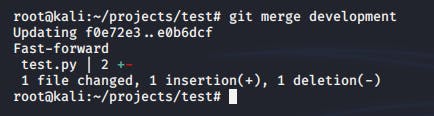
Now that we have made changes to the development branch, "tested" the changes and merged it with the master branch, lets push these changes to the remote repo with the following command.
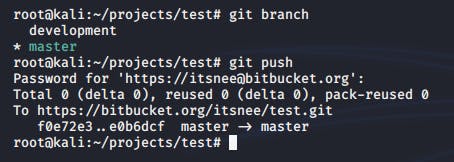
Lets verify this on BitBucked.

We can see that we have successfully merged the development branch with the master branch as our comment that we added now appears in the test.py file located in the master branch~!
Deleting a branch
Now that we are "done with development", lets look at how we can get rid of the development branch. We can do so by using the following command.

And that's it! That's all the basics that we need to know to get started with GIT! Hope this helped :) I know it definitely helped me! Thank god I won't have to do any of those manual version control anymore! I really hope GIT becomes an industry standard and the people I collaborate with are familiar with it! Till next time....👋BYE
~Nee