
Wifi Penetration testing was always something I wanted to pick up. I recently got my hands on the hardware for it thanks to a mentor of mine which enabled me to perform a range of wireless attacks in my home lab environment! If you're interested in setting up your own Wifi Pineapple, check out my in-depth guide over on my repo site!
Capturing Wireless Handshake
Like every other penetration test, this starts with recon too! The first step to the attack would be to identify our "target". In this case, I will be attacking my own network.
Recon
Like every other penetration test, this starts with recon too! The first step to the attack would be to identify our "target". In this case, I will be attacking my own network.
Scanning
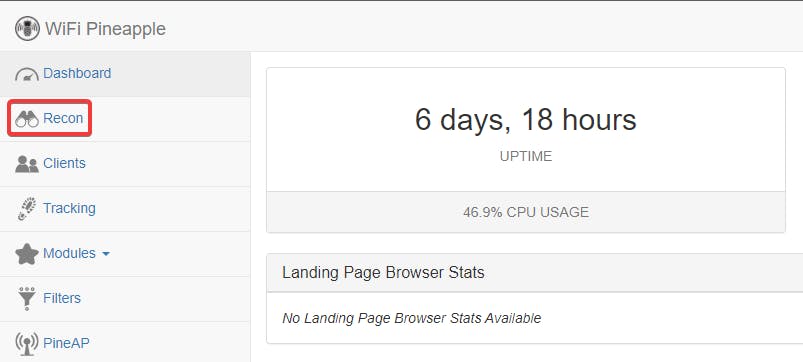
- Access the Recon Tab
- Setup Scan Settings and Run Scan
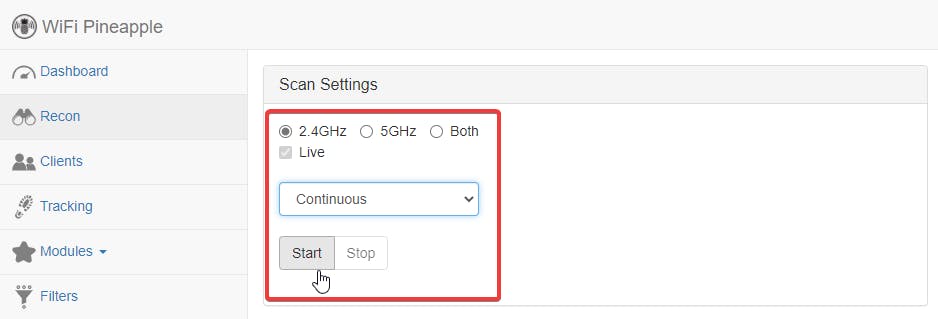
- Running Scan

Targetting
Once the scan is left to run for a short period of time, multiple targets should start popping up (As seen below). All these networks are the ones that are in the range of the Wifi 🍍.

Target Network
Here's my network which I'm gonna be attacking! (shown below)

It's evident that one client is currently authenticated with the network. The MAC address of the client is shown right below the router's MAC.
Attacking
Now that we have our target and have verified that there are clients connected to it, we can conduct a deauth attack on the network and listen for handshakes destined to the network. Deauthenticating clients from a network will force them to reconnect to it. While the reconnection is happening, we would be able to sniff and capture the handshake which we can then use to crack :)
Launching Attack
Hit the dropdown on the security tab

Hit Start Capture

Hit Deauth

Successful Capture of handshake

At this point, we have obtained a capture of the handshake which can then be used to crack the Pre-Shared Key (PSK) of the network with a trusty wordlist.
Live Attack (On client)
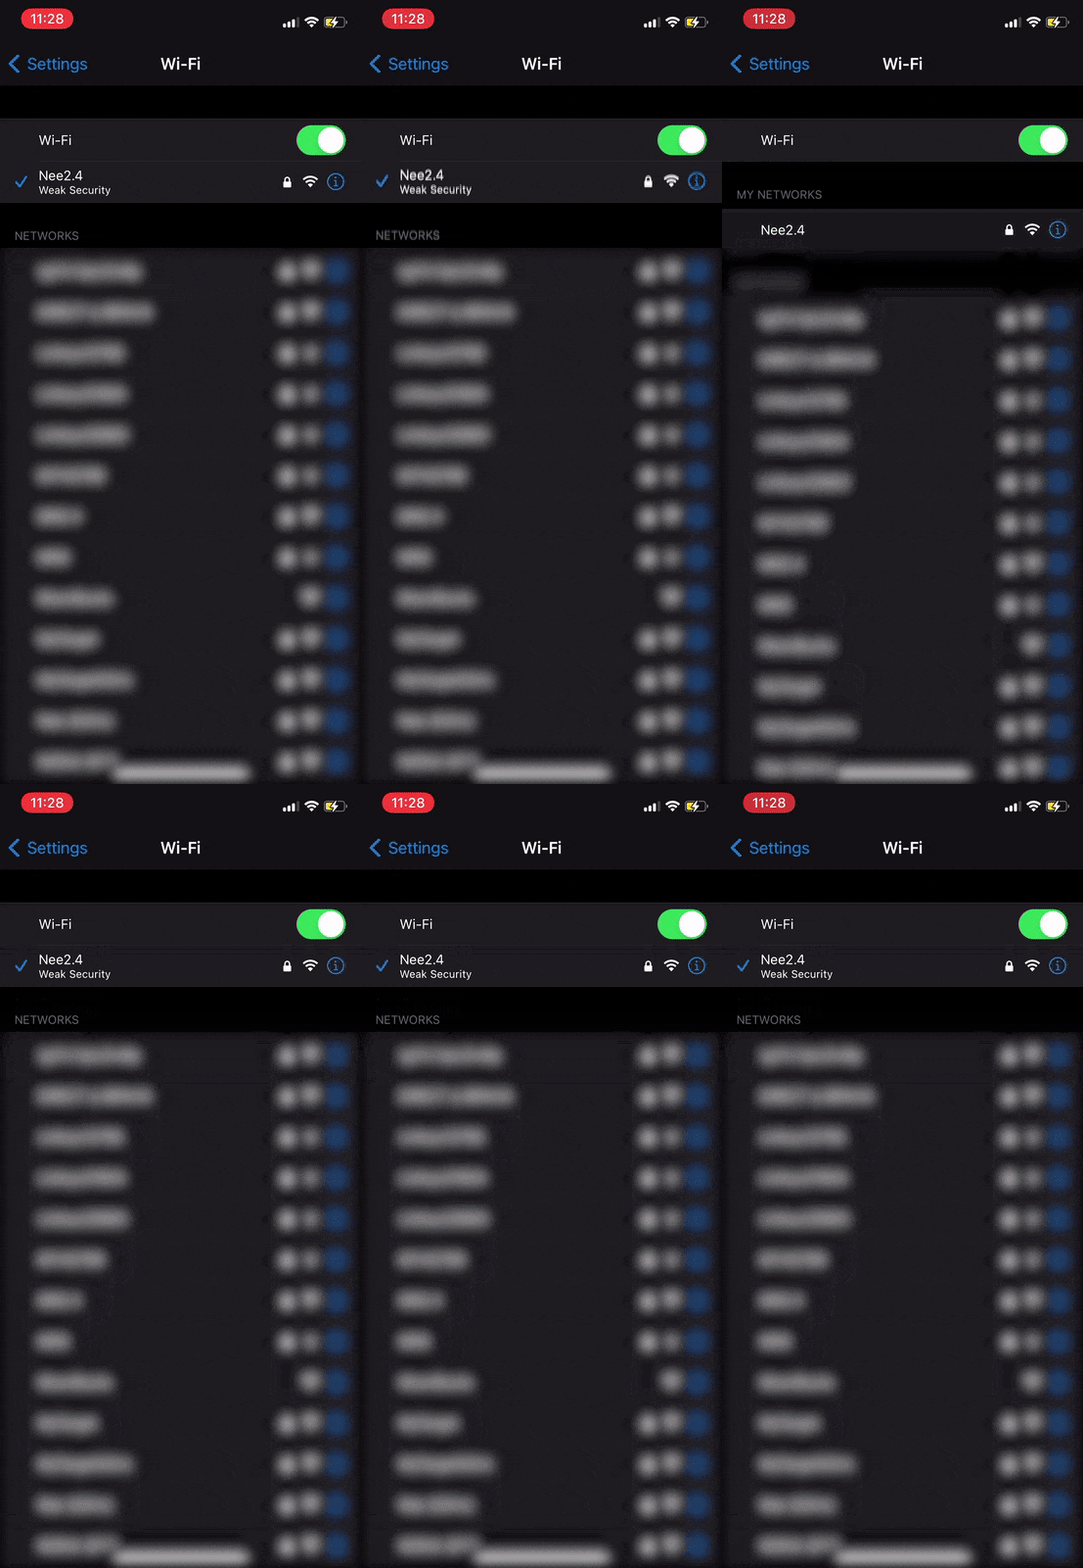
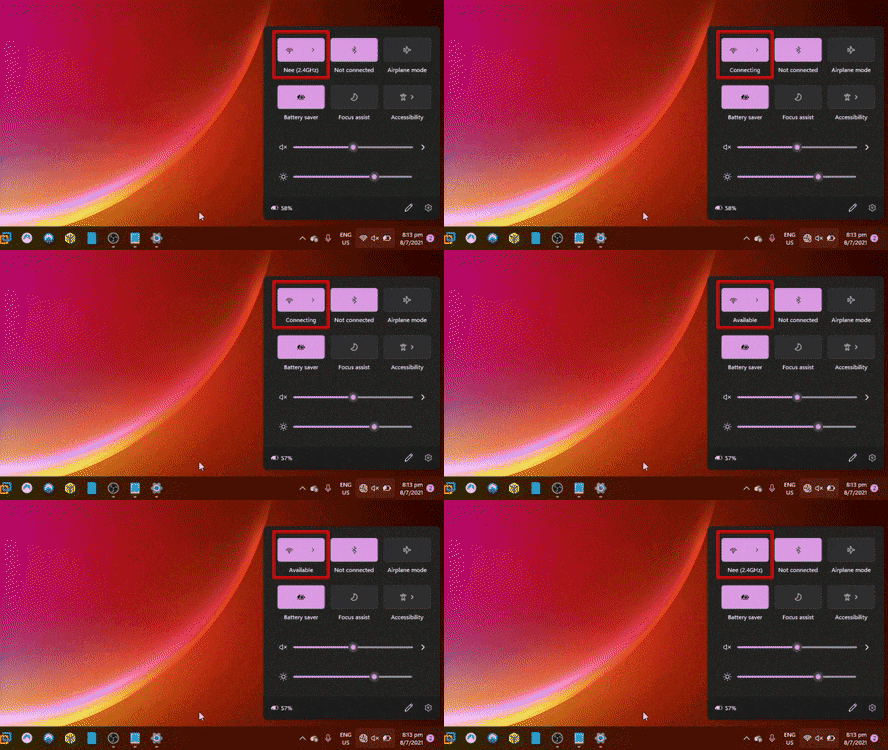
This is what the client would witness when the attack is underway. Most of the time we wouldn't even notice this happening when we are out and about, going through our regular day.
Mobile
Desktop
Cracking WPA2 Handshake
This section will cover how to crack WPA2 handshakes captured with the previously showcased attack vector
Cracking
We need to convert the captured .pcap file into .hccapx format in order to start cracking with it. There's a tool named cap2hccapx which can help us do this. However, we first need to download and compile it on our unix system.
Compiling cap2hccapx
Downloading Source
wget raw.githubusercontent.com/hashcat/hashcat-u..

Compiling Tool
gcc -o cap2hccapx cap2hccapx.c

Testing Tool
./cap2hccapx

Converting
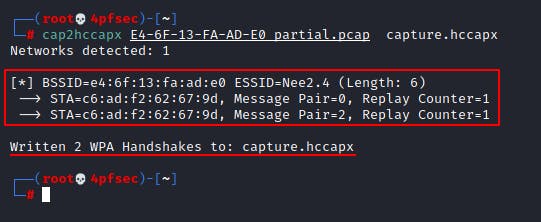
Now that we have the tool compiled and ready to go, we can convert the file and prep it for cracking!
cap2hccapx E4-6F-13-FA-AD-E0_partial.pcap capture.hccapx
Cracking with .hccapx
I'll be using Hashcat for the cracking on my host machine. Here's a post where I explain why cracking on the host machine is better 😊!
.\hashcat.exe -m 2500 .\hashes\capture.hccapx .\wordlists\rockyou.txt --force
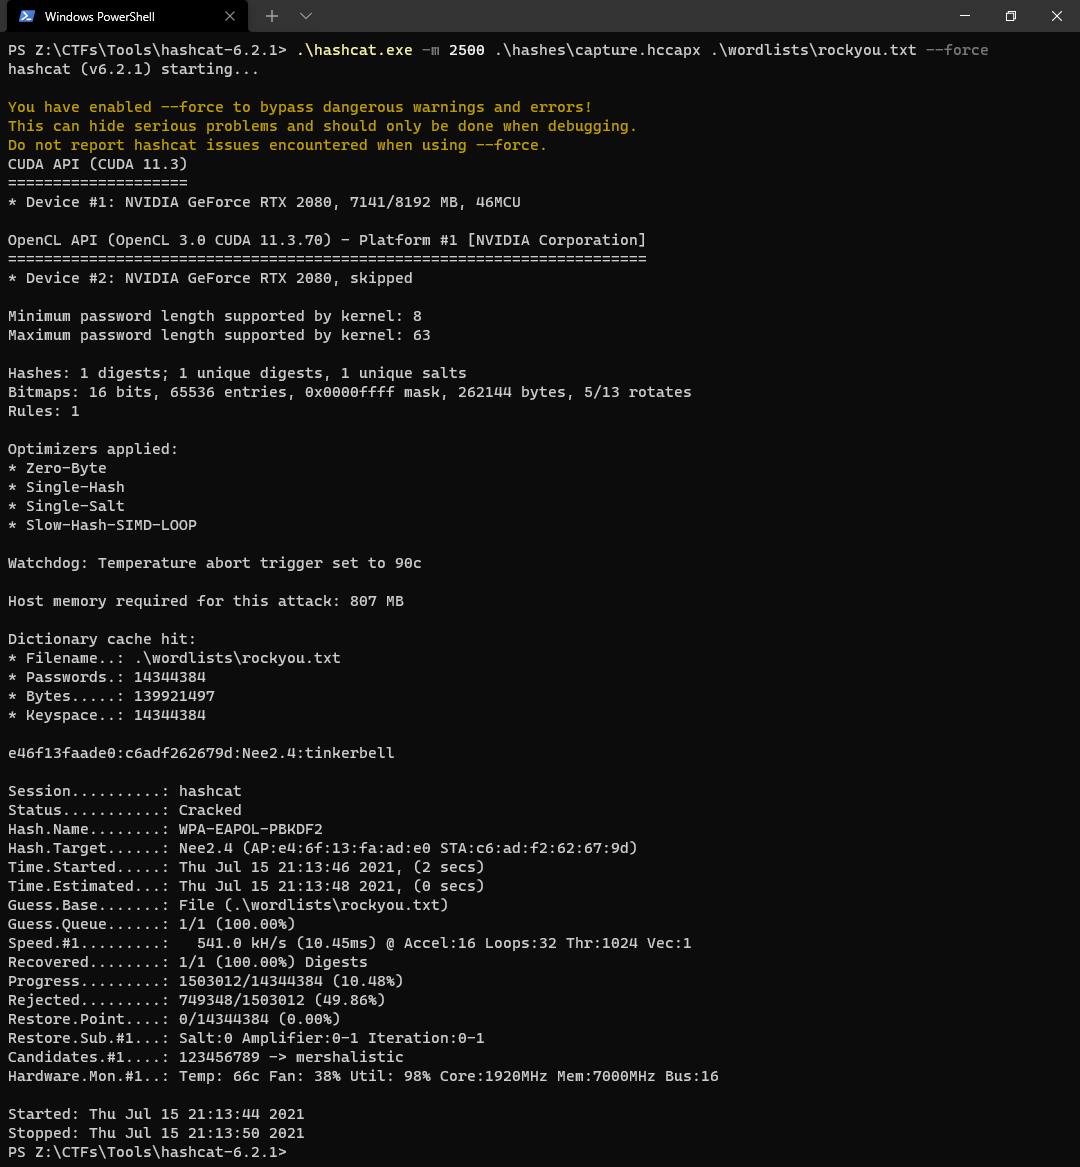
e46f13faade0:c6adf262679d:Nee2.4:tinkerbell
tinkerbell is the PSK of the network in question
We were successfully able to crack the handshake and retrieve the password to the lab network!
Modules
This section contains information about community modules that can be used on top of the PineAP Attack
Background
The WiFi Pineapple was created with modularity in mind. The WiFi Pineapple supports community-developed modules in addition to the system modules supplied with the WiFi Pineapple, such as Recon, Clients, and PineAP. The WiFi Pineapple API is used by several community-developed modules to expand functionality. This API can be used by anybody to build modules for the WiFi Pineapple.
Modules
Let's take a look at some of the community-made modules in this section!
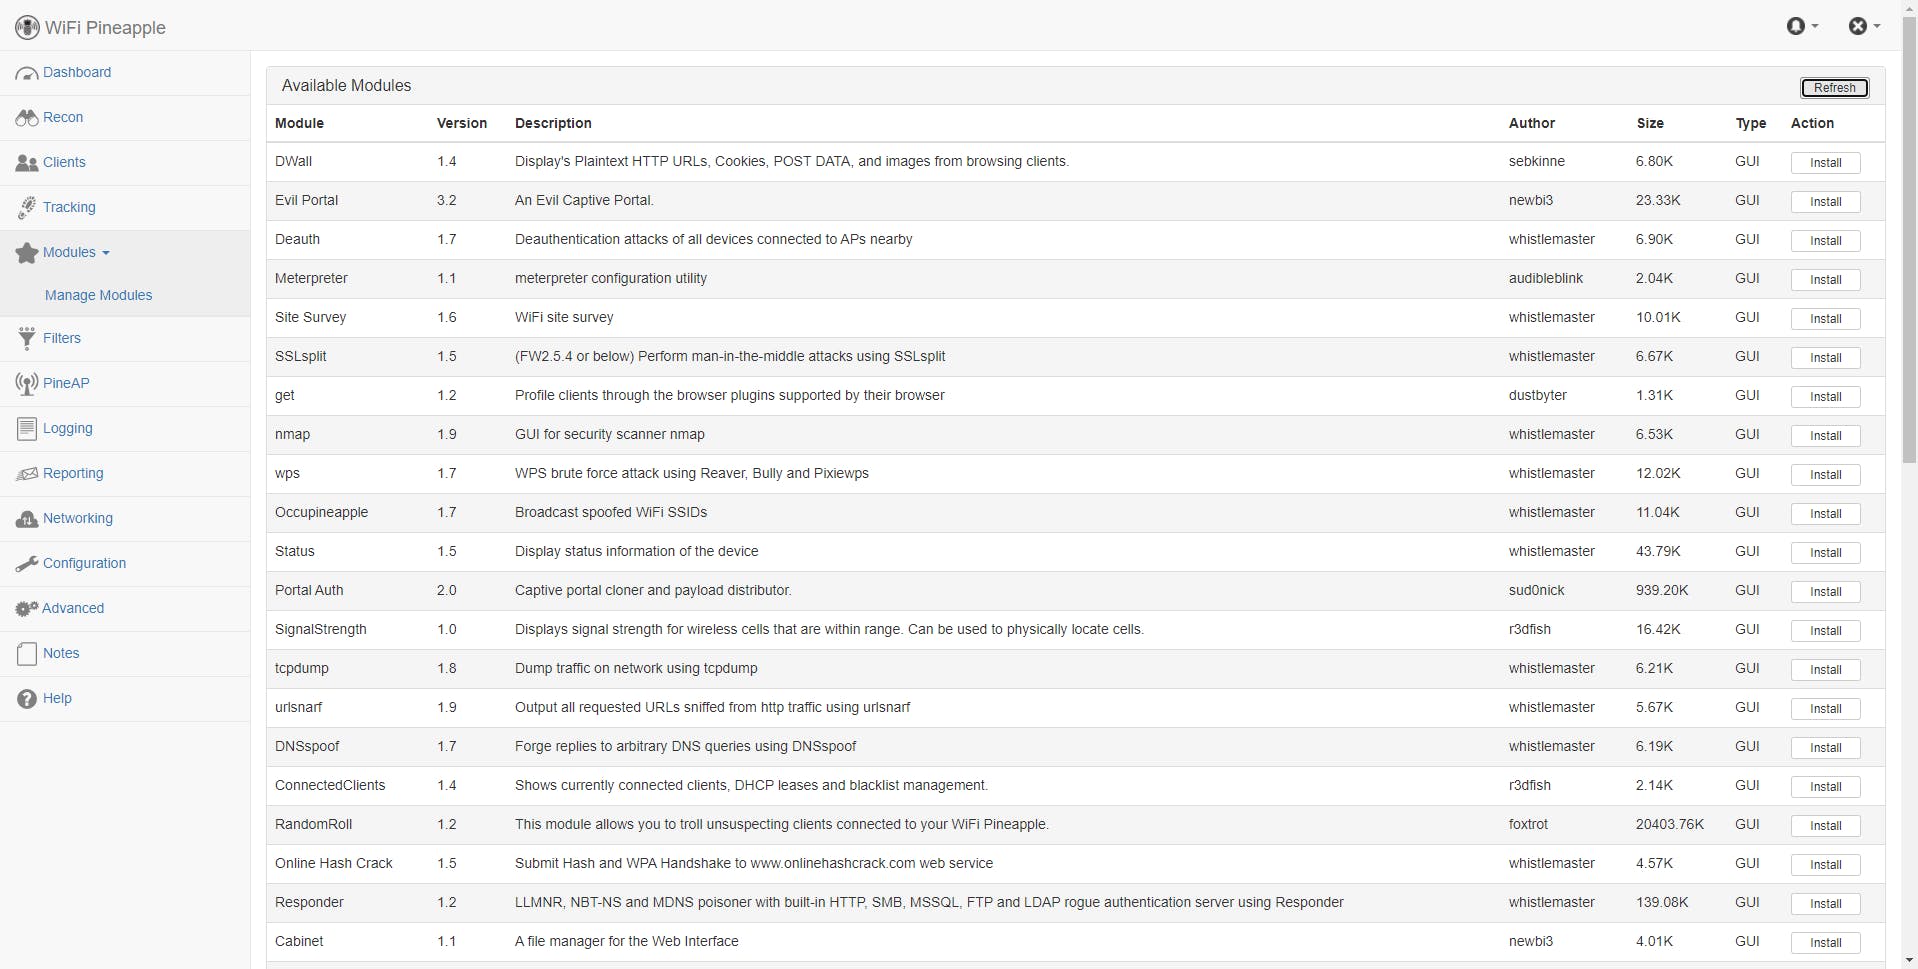
We'll assume we already got our target to connect to our rogue network beforehand
TcpDump

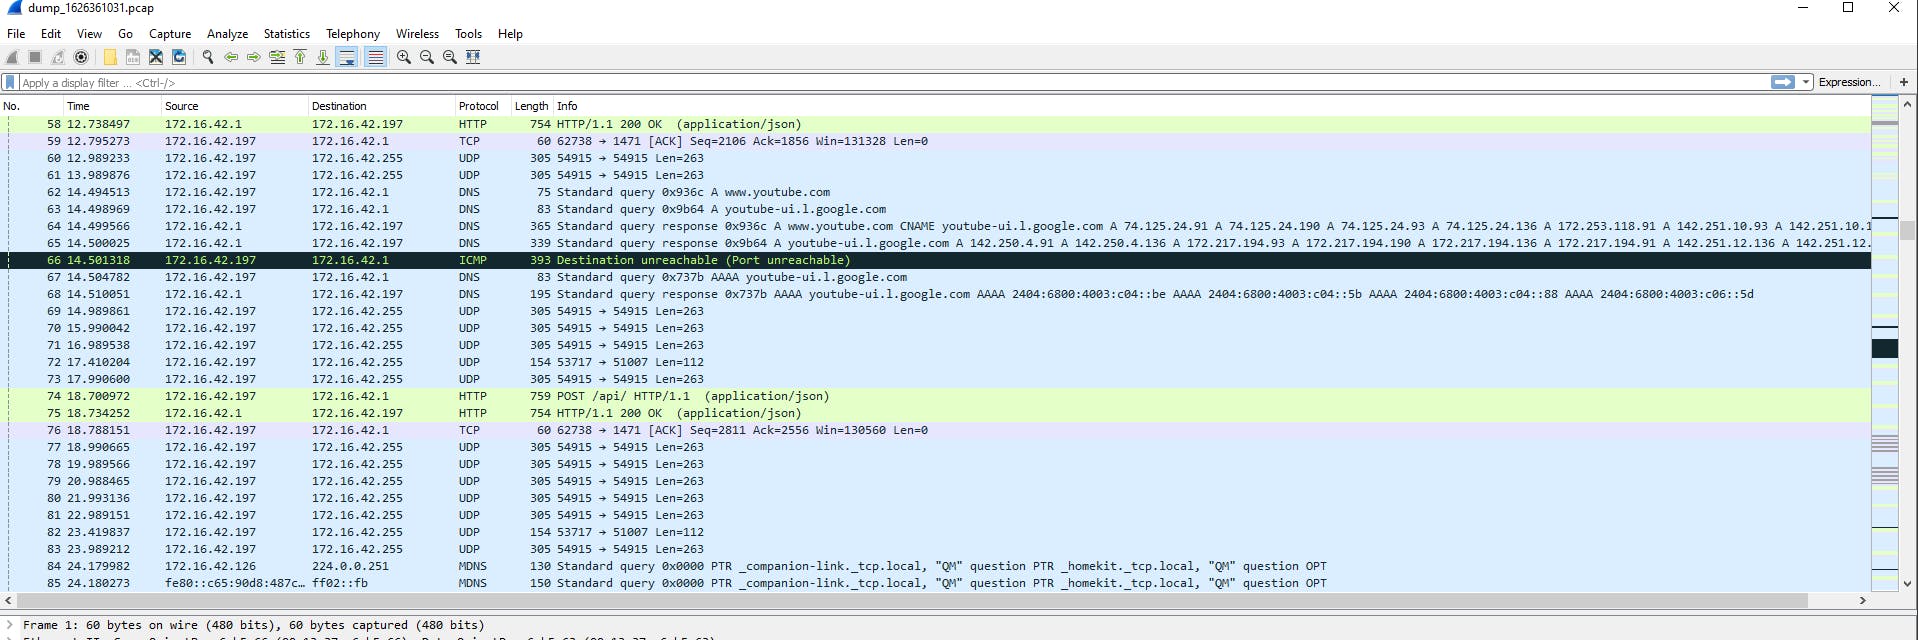
This module is pretty self-explanatory. It assists us by dumping all network traffic generated by our clients. This module comes in very handy in case when we want to inspect our client's network traffic for some insecure traffic and possibly sniff out some passwords or files that were transferred.
Demo

Hit start and we'll be running
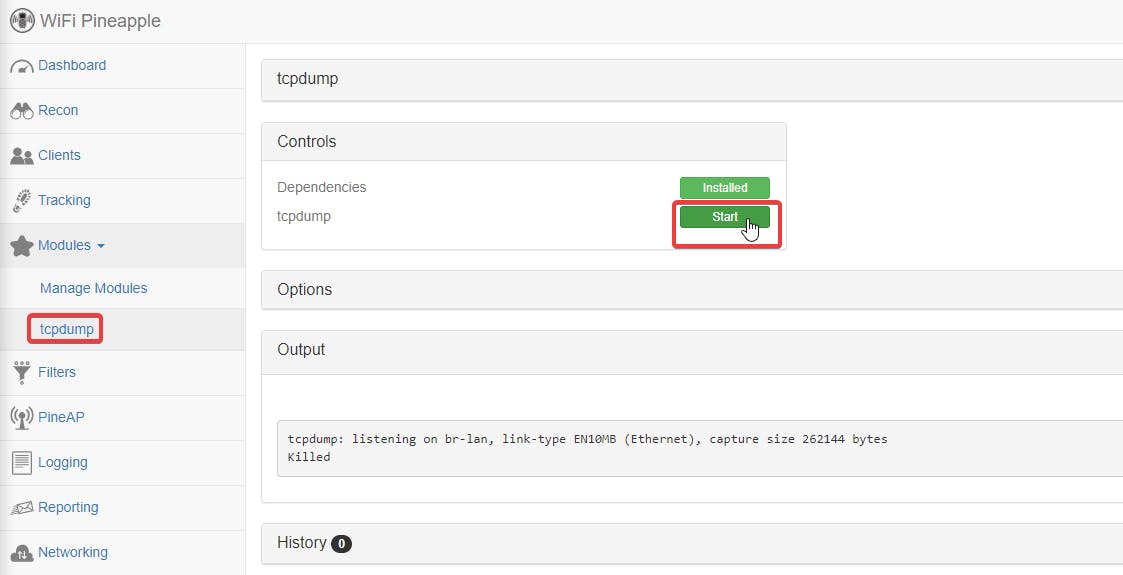
Once done, hit stop and download the capture for analysis


Analysis
We can simply open the capture up with Wireshark and proceed with our analysis.
DWall

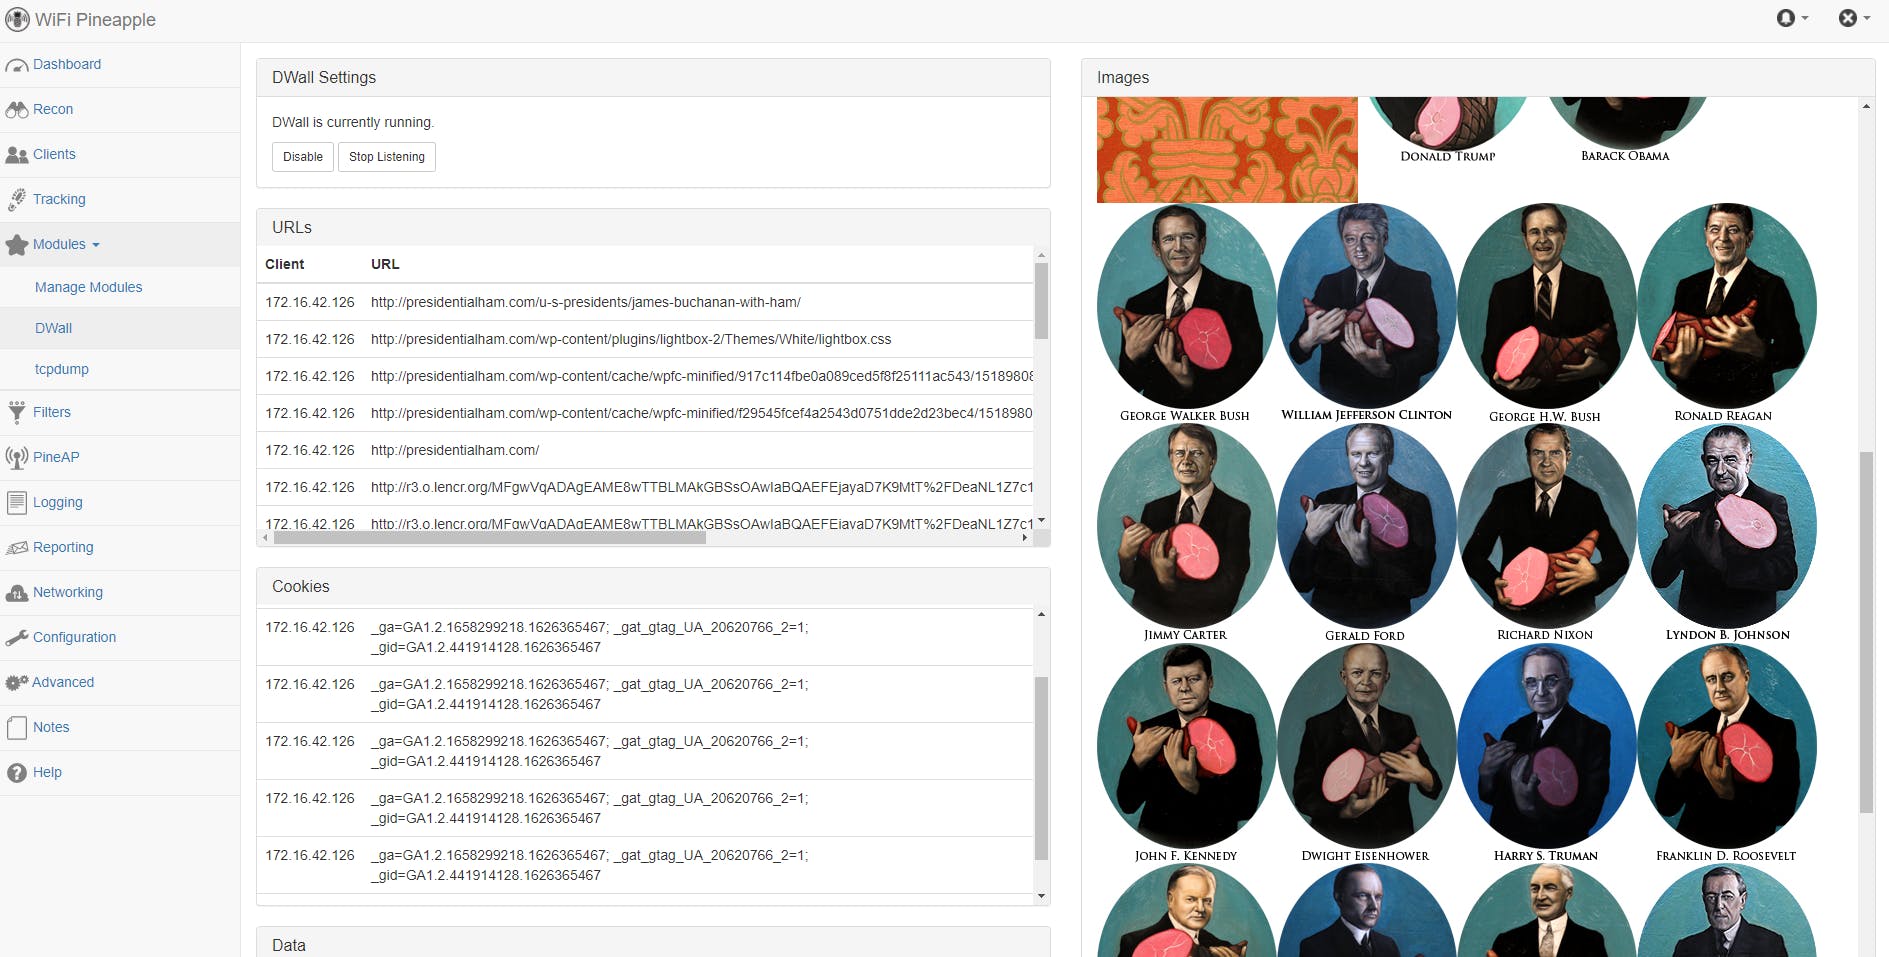
DWall is similar to TCPdump, but it focuses on web! DWall display's Plaintext HTTP URLs, Cookies, POST DATA, and images from browsing clients. This has a similar issue to TCPdump. We will only be able to see insecure traffic!
Demo

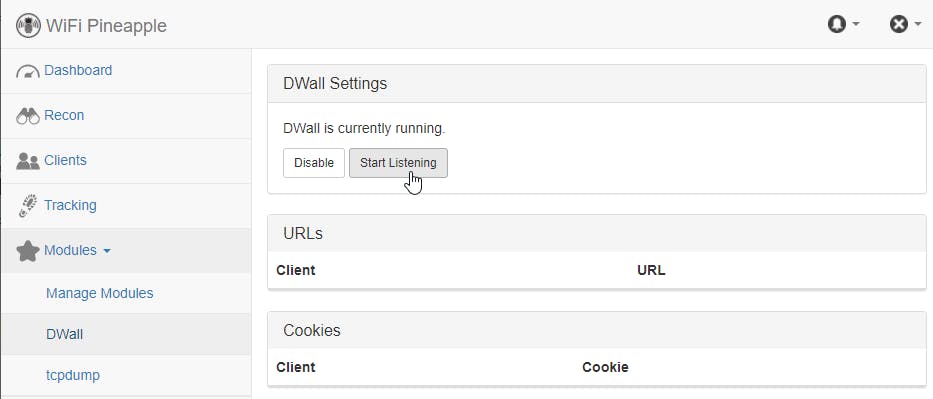
Hit start listening to start capturing web traffic from clients
As the Clients browse insecure sites, their data would be relayed to us on this page (as shown below)
Client View

Wifi 🍍 View
DNSMasq Spoof

This module forges replies to arbitrary DNS queries using DNSMasq.
Demo

Hit Start to run the spoofer
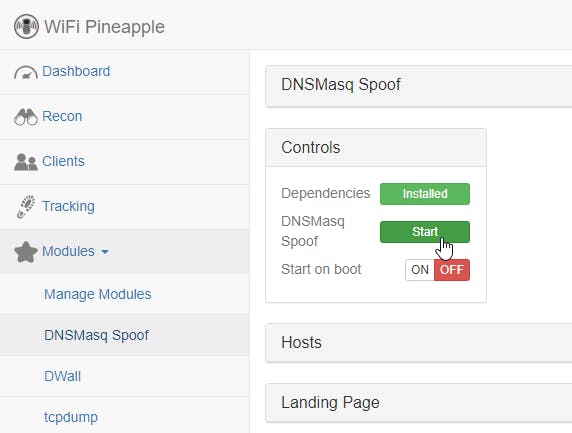
Add a custom host entry to redirect hosts

I'll be adding a fake entry for example.com. example.com is an actual site that people can access on the web. The real site looks like the following:

Now that we have pointed it to a different IP address containing our "evil portal", let's see what happens to the clients connected to our rogue network.
Live DNS Attack
Here we can see one of the rogue network's clients navigating to example.com but its totally different from what the actual website is. This shows that an attacker/man-in-the-middle is able to easily reply falsely to your DNS queries and this is highly likely to end up as a phishing attack.

PineAP
This section contains information on PineAP and how it can be used
Background
PineAP is a powerful, modular rogue access point suite that helps WiFi auditors collect clients by imitating Preferred Networks. Leveraging PineAP, we are able to see what SSIDs devices are trying to look for. Using that information and PineAP's features, we are able to advertise ourselves as that SSID which the device is looking for.
Example
Let's say you were authenticated to your home network named 4pfHome . Your phone will then try to look for that same SSID when you're outside and have your WIFI on. PineAP will then see this and advertise itself as 4pfHome to your device. If connected, you will be one of Wifi 🍍's many clients, and that's not good. Let's take a look at how it's done!
Live Attack
Prior to launching the attack, the PineAP first has to be set up to listen.
PineAP Setup
Enabling the following options to be able to capture and rebroadcast SSIDs
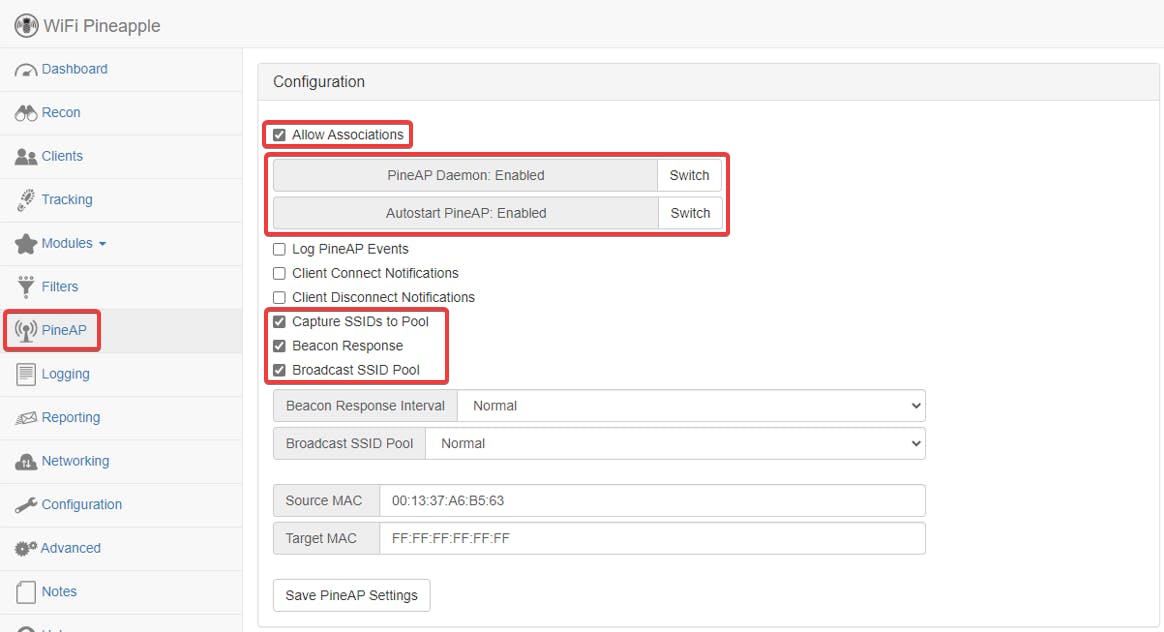
Broadcast Attack
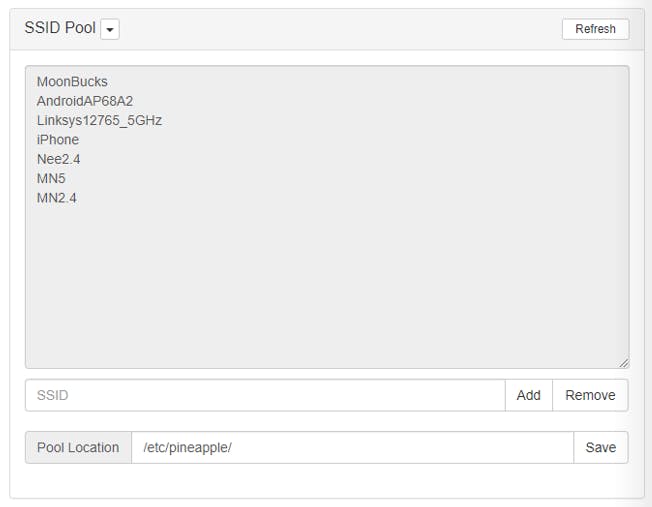
After letting PineAP do its thing for a while, we are able to see a couple of SSIDs in the SSID Pool .
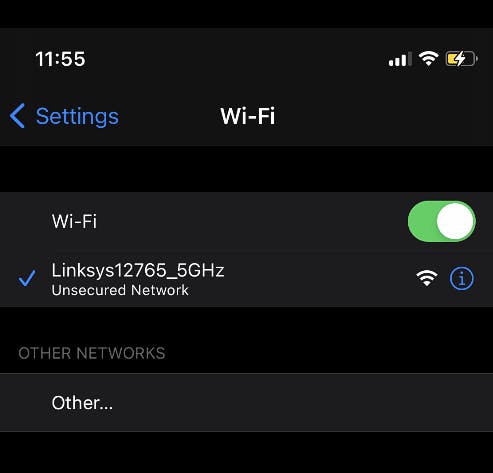
Now on my devices, I would be able to see these SSIDs being broadcasted and unprotected. (as shown below)
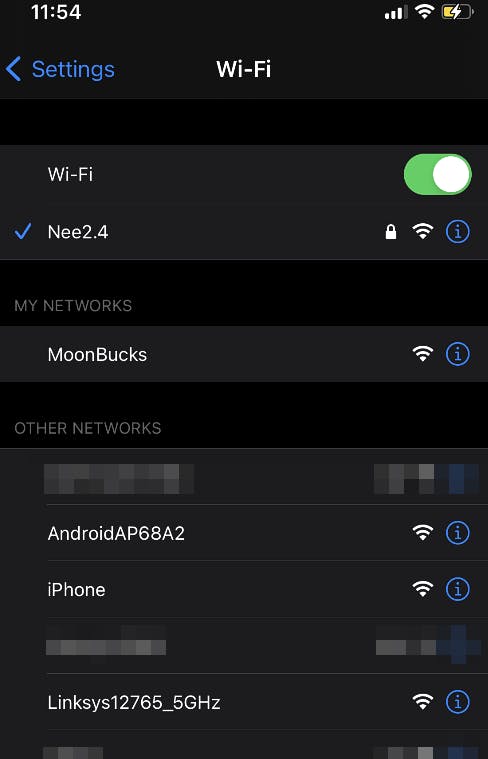
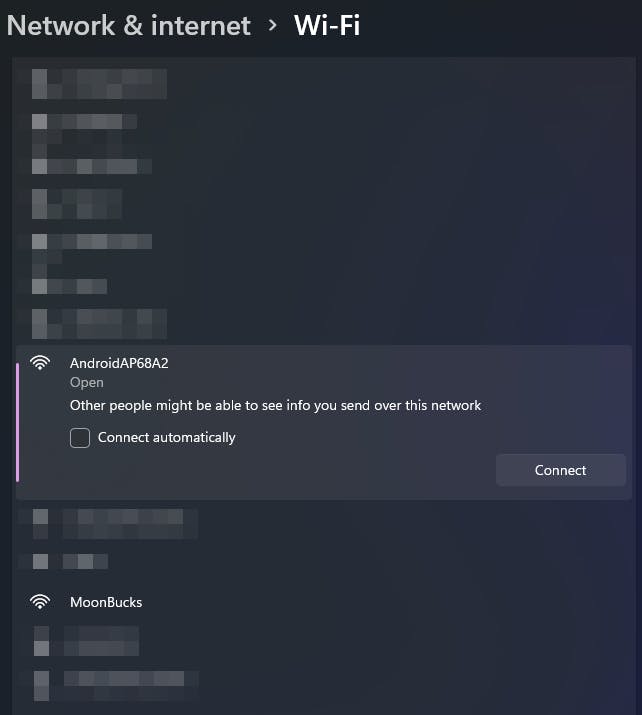
Now once our "target" connects to our network, we own it :) (kind of)
Client Connect back

Clients

We can see that both the devices are connected to the Wifi 🍍 but they are connected under 2 different SSIDs. My laptop thinks it is connected to AndroidAP68A2 and my phone thinks it is connected to Linksys12765_5GHz .
The connected devices won't realize a thing as the Wifi 🍍 is connected to the internet and acts how any other router would.
Now that we have both devices connected to our bogus network, we can use Modules (which will be covered in the next section) to perform various attacks.
This is how we can make use of PineAP to trick users to connect to us.
From my testing, I wasn't able to get the devices to connect to the endpoints automatically. Thus, this attack still depends on the user to make the final decision to connect.
That was an awesome way to get introduced to wireless hacking! I wish to explore more manual options in the near future 🔥!

