Enabling Wake-on-Lan on Windows 11


WOL is a pretty neat feature that allows a user to boot a pc via another server/system on the same network. For my use case, this helps me save electricity whenever I don't need my system to be running. My Windows 10 setup stopped functioning after the upgrade to Windows 11. Here's how I got it working once again after the upgrade.
Prerequisites
- Ensure that the motherboard supports WOL and the feature is enabled in bios
- A system with Windows 10/11
WOL Setup
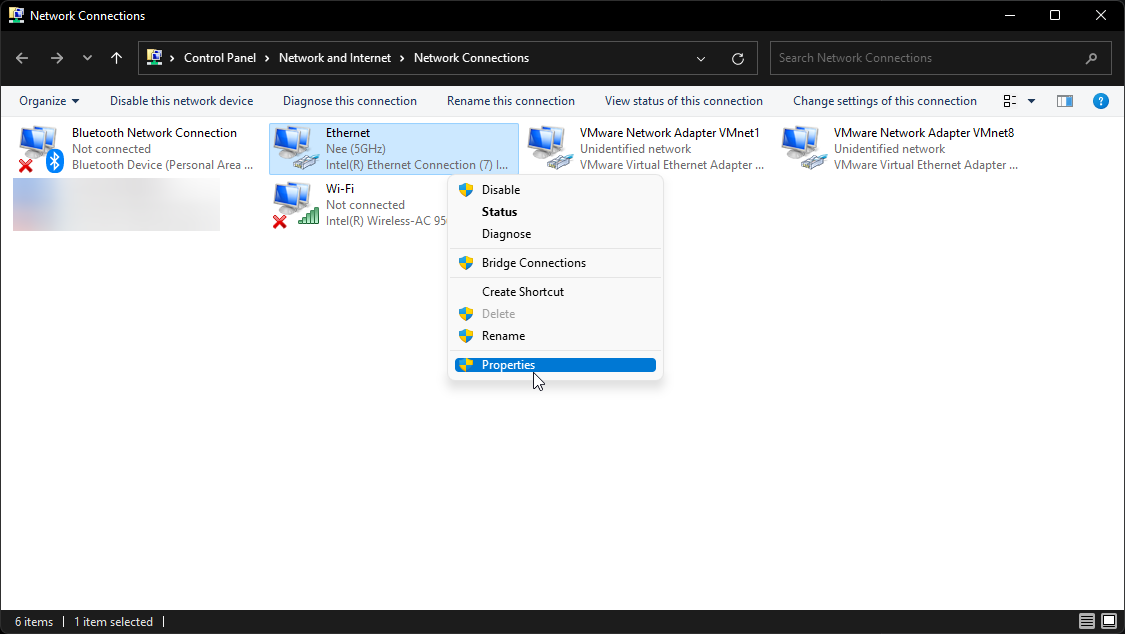
To set up WOL, we need to first identify the ethernet adapter we want to use for WOL on the system. Hit Windows + R , enter the following command and hit enter.
ncpa.cpl

Next, locate your Ethernet adapter and head to the properties.
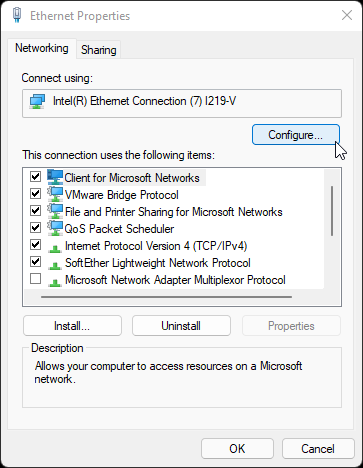
Hit configure once the ethernet properties window pops up.
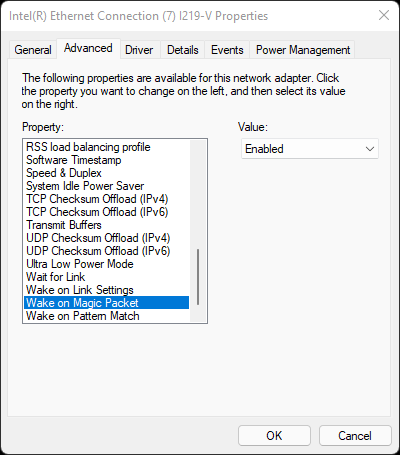
After a new window pops up, head to the advanced tab and set Wake on Magic Packet's value to Enabled.
Next, we need to change some power management settings for the feature to work well. I missed out on a step during this step which cost me a couple of hours ☹️. Hit Windows + R , type the following command and hit Enter.
powercfg. cpl

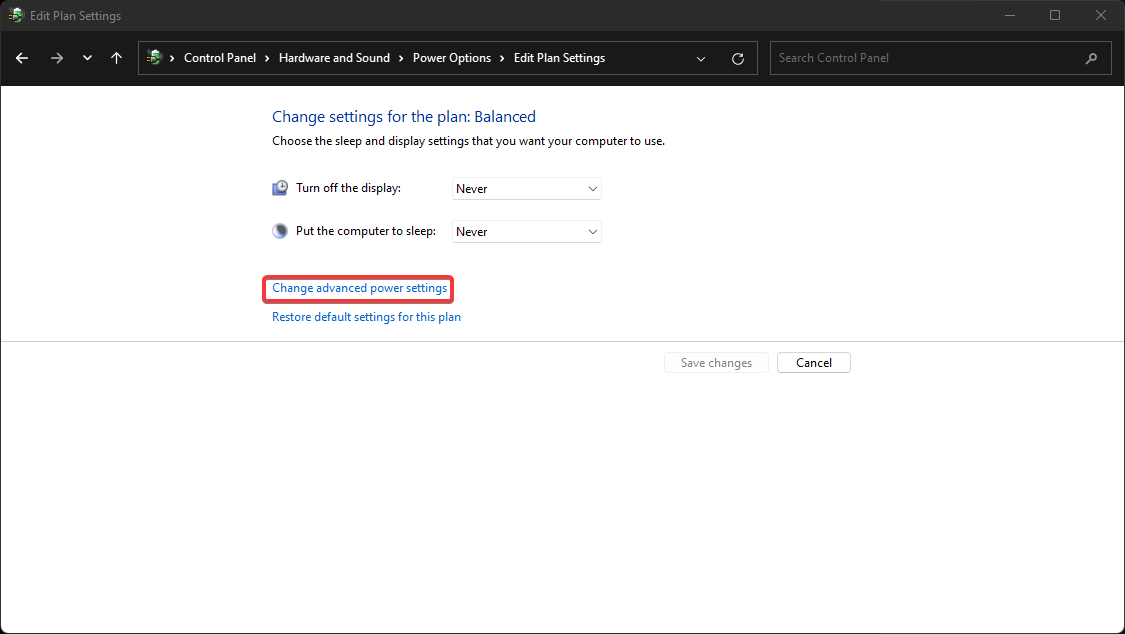
Then, select Change Plan Settings for whichever plan you are currently using and hit Change advanced power settings.
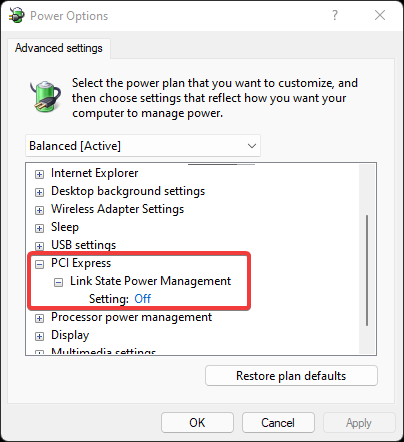
Head down to the PCI Express option and set it to Off as shown below.
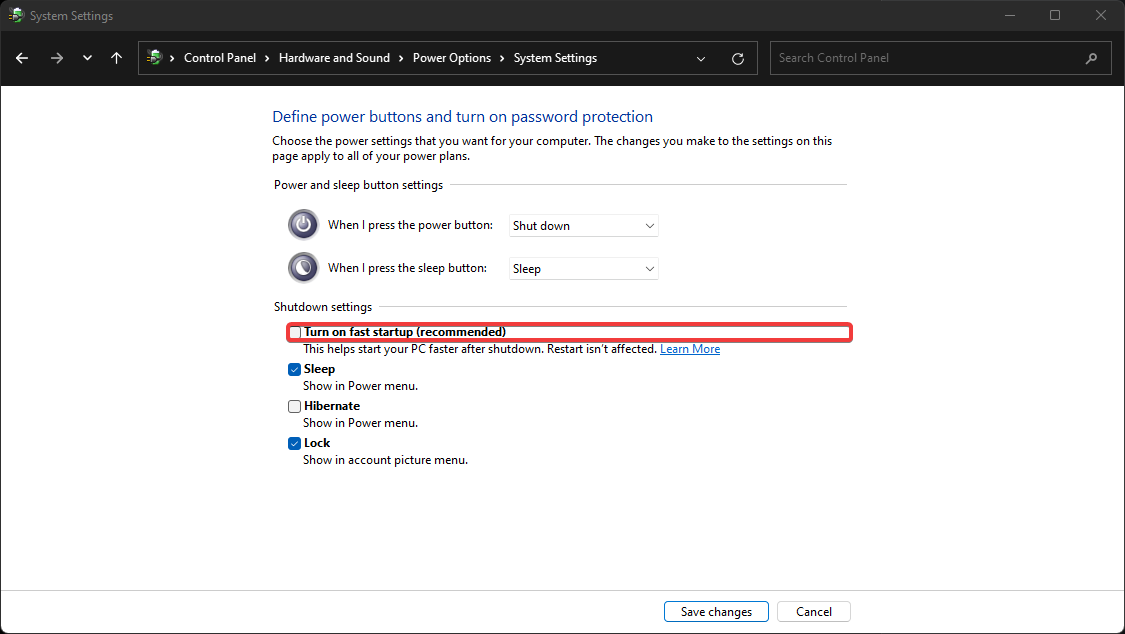
Once that's done, head back to power options and select Choose what the power buttons do , hit Change settings that are currently unavailable and uncheck Turn on fast startup.
Save changes and the system's all good to go! All that's left is to use another machine in the same local network and send a WOL magic packet to the router while specifying the MAC address of the windows machine's network adapter.
Hope you didn't waste hours figuring this out 😄!