I've always wanted my own VPN server that I could tunnel through! I just never had access to or even owned a virtual private server (VPS)….until now! So I decided to set it up as an OpenVPN server/node! Lezgooo!
Prerequisites
(There isn't many tbh)
- VPS (with Linux)
- SSH Client (to connect to VPS)
Creating a VPS
For this I am going to be using my go-to VPS provider, Digital Ocean.
(heads up: digital ocean uses the term droplet to refer to a VPS)

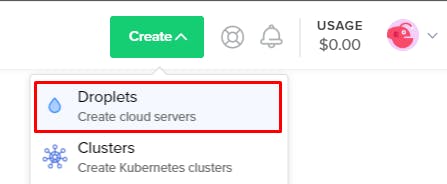
After creating an account with digital ocean, go ahead and create a new droplet with Ubuntu 18.04.3 (LTS) x64 as the base image. I followed digital ocean's official documentation here!


Remember to pick your base image and region wisely! You will not be able to change these after setting up the droplet unless you destroy it.
Creating a user with lowest privilege (non-root)
Anything can go wrong when it comes to security. Its always recommended to setup and manage services and software with non root accounts. Even if our machine were to get broken into, we wouldn't have that much to lose as the attacker would not have access to a root account. So lets go ahead and do that first!
(also...don't forget to add a password for your newly created account)
useradd -G sudo -m nee -s /bin/bash
passwd nee (enter password 2 times to confirm)
That's it! We're done with setting up a low privilege user account.
Installing /~/ Configuring OpenVPN
So now that we're all setup with the VPS and the user account, lets get to the juicy part! Let's start installing and configuring OpenVPN on our VPS :)
First, lets start of by installing wget. We will be making use of this tool to grab the bash script that we will be using to setup OpenVPN.
nee@Nee:~$ sudo apt install wget
[sudo] password for nee:
Reading package lists... Done
Building dependency tree
Reading state information... Done
wget is already the newest version (1.19.4-1ubuntu2.2).
wget set to manually installed.
0 upgraded, 0 newly installed, 0 to remove and 16 not upgraded.
After verifying that we have wget, lets go ahead and grab the bash script form here!
nee@Nee:~/openvpn$ wget raw.githubusercontent.com/Nyr/openvpn-insta..
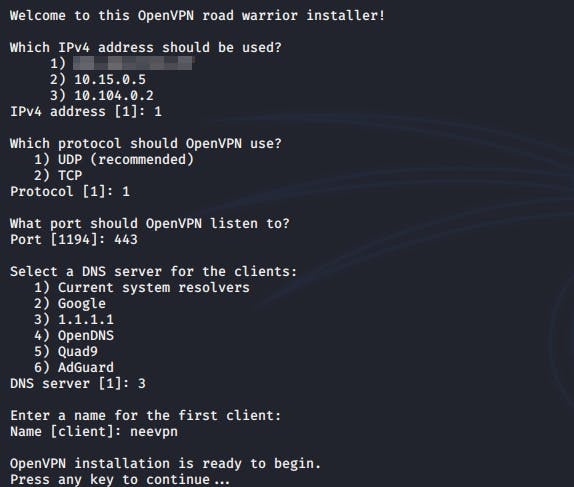
Followed by that, lets start setting OpenVPN up! Enter the following command in order to launch the script. The script will have a few questions for us in order to set everything up properly.
sudo bash openvpn-install.sh

Answer accordingly to each prompt
- 1st prompt: you want to pick the public IP address of your VPS. I blurred mine out for obvious reasons
- 2nd prompt: I went with
UDP - 3rd prompt: I chose port 443 as I've setup UFW firewall on my VPS to block most ports.
Port 443is also being utilized by HTTPS. However, that would not hinder our VPN as HTTPS is running on TCP and our VPN is running on UDP.(now it would make sense why I went with UDP for the 2nd prompt) - 4th prompt: This is actually based on user preference :) I went with
1.1.1.1as I've been using that on my host machine for quite awhile now. - 5th prompt: Pick the name of your client. (this could be literally anything)
And that's it! Hit enter and we'll end up with a OpenVPN config file that we can use.

Next, lets move the config file over to our root directory so we can grab it from the VPS later on! use this command to do so.
cp <client-name>.ovpn /root/
Last but most importantly, lets disable logs on our VPN server!
Anonymity is key
We will need to edit the OpenVPN server config file like so...
- Open the server config file
change
verb 3toverb 0[line 24]sudo vi /etc/openvpn/server/server.conf

After doing that, restart the OpenVPN service and we are complete!
sudo systemctl restart openvpn-server@server-service
Checking the status of OpenVPN server
Now that we have set everything up, lets check if our OpenVPN server is running as per normal with the following command.
sudo systemctl status openvpn-server@server-service

Looking good! Our server is up and running just like its supposed to.
Testing our newly setup OpenVPN server
Okay, so the first thing that we need to do is grab the OpenVPN config file from the server to be able to use it. Lets do that using the following command.
sftp root@server-ip

Now that we have gotten the config file from the VPS, lets test it out! I will be using OpenVPN's windows client which can be found here, to test this out.
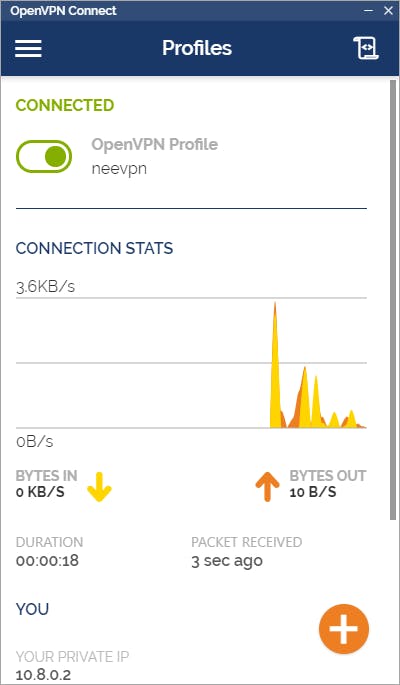
After installing the client, import the config file that we got from the VPS, select connected on add and hit add.

If everything was done correctly, you should see something like this. P.S you can use this VPN on your phone too (Android/IOS)!
And we're done! That's how you setup your own OpenVPN Server and tunnel through it whenever u gotta do some shady stuff 😏! Anyways, jokes aside this was meant for educational purposes only! Hope you learnt a thing or two! Thanks for reading!!
~Nee

